Arduino data logger - part 2 (Real-Time Clock - RTC)
- Dario Pittera
- Aug 21, 2021
- 3 min read

Finally! Here I am with the second part of my simple data logger.
What's new in this second part? I just wanted simply to use a shield that can keep track of the time so that the data makes more sense.
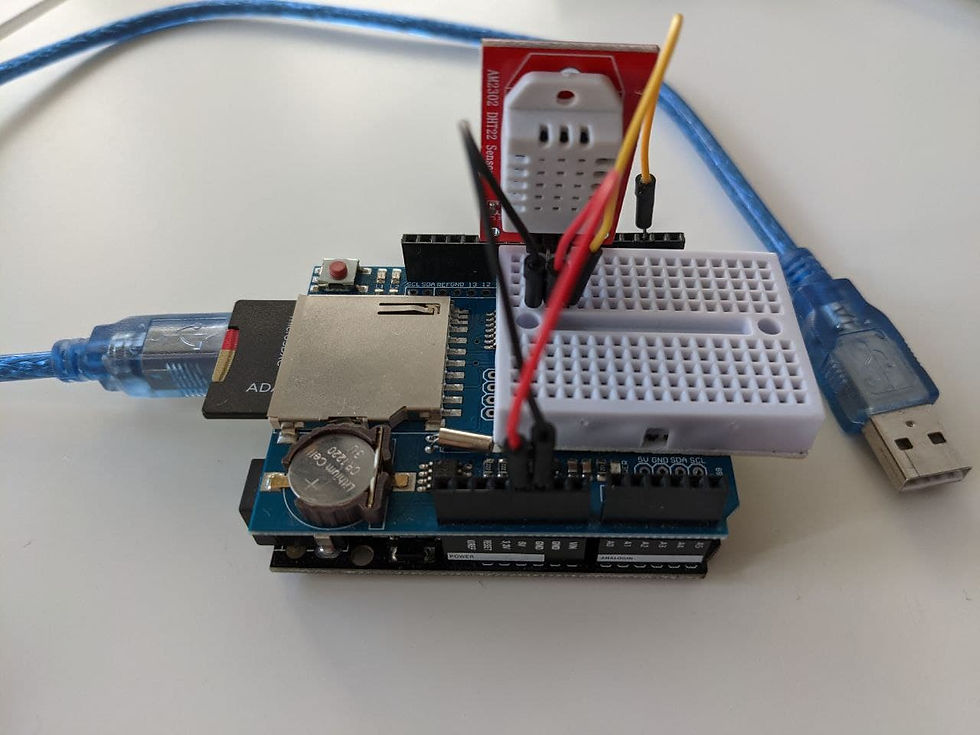
For this purpose, I am using a shield that has an integrated RTC (real-time clock) and a battery slot (for a CR1220 battery) so that even when the Arduino is not powered, the internal clock will keep ticking.
Let me post the new scheme for this little project. As I have a new shell, and as this is the simplest example I could put together, I have fewer cables lying around :)

The new script is really simple and, for the moment, minimal. There are two things to do:
Set up the date and time on the Arduino
Flash the script that will serve for the data logger
Setting current date and time on your Arduino
Let's deal with point 1. For this purpose, we need to install the RTClib on our Arduino IDE. To do that, on the Arduino IDE, click on: Sketch → Include library → Manage libraries. In the search bar (top right) write "RTClib"; when you find it, and click on the "Install" button. Sweet! You got it.
Now, let's simply upload the "ds1307" example on your Arduino to set up the current date and time on your device. On your Arduino IDE, click on File → Examples → RTClib → ds1307. Then, simply upload it to your Arduino ("⇾" button).
Note: the date and time will be the one at the time when the script is being compiled, so there might be a few seconds delay (i.e., your device will be a few seconds early in comparison to your PC clock). Obviously, you need to make sure your PC clock is correct because that is the date and time that will be set to your Arduino.
This is the line that will set the date and time on your device:
rtc.adjust(DateTime(F(__DATE__), F(__TIME__)));
Not that you could set a specific date and time other than the current one. The next line, for instance, will set the date to Chrsitmas 2020 at 6 am 🤷:
rtc.adjust(DateTime(2020, 12, 25, 6, 0, 0));
At this point, your Arduino knows the current date and time, and thanks to your battery (REMEMBER TO PUT IT IN THE SHIELD) your Arduino should keep ticking for years! Eventually, the precision might be impaired, and you will need to set up again the date and time, but well...Point 1 is done 🏁, and you don't need to set up the date and time again.
Script for the data logger
Now let's focus on point 2 - uploading the code for the logging of our data (i.e., temperature and humidity levels from our DHT22 sensor). It resembles the script used for the data logger part 1, but it is simplified for the most basic example possible.
The only change in comparison to Part 1 is that now we need to add to the log file two new columns that contains the date and time of the measurements. This means that when we will initialise the file headers, we will add these new columns:
// initialise data file with headers
myFile = SD.open(filename, FILE_WRITE);

// if the file opened okay, write the headers in it
if (myFile) {

 // write the headers in one line comma separated
 // every time the Arudino starts (ID, Datetime, Temp, Hum, Flag)
 myFile.print("ID");myFile.print(",");
 myFile.print("date");myFile.print(",");
 myFile.print("time");myFile.print(",");
 myFile.print("Temperature");myFile.print(",");
 myFile.println("Humidity");

 // close the file:
 myFile.close();
 }
Below the important bits. To save the date and time, we will need the RTC library and three simple lines of code:
// import libraries and initialise the clock
#include "RTClib.h"
RTC_DS1307 rtc;

// let's start the DateTime object
DateTime now = rtc.now();

// create current_date variable
sprintf(current_date, "%4i/%02d/%02d", now.year(),now.month(),now.day());

// create current_time variable
sprintf(current_time, "%02d:%02d:%02d", now.hour(),now.minute(),now.second());
In this way, we created two variables "current_date" and "current_time" that we can write in our log file.
// write the headers (our columns) on the SD card log file
myFile = SD.open(filename, FILE_WRITE);

if (myFile) { // if the file opened okay, write to it:

 // log into file on the SD card
 myFile.print(id);myFile.print(",");
 myFile.print(current_date);myFile.print(",");
 myFile.print(current_time);myFile.print(",");
 myFile.print(t);myFile.print(",");
 myFile.println(h);

 myFile.close(); // close the log file
 id++;           // increase the id number

 delay(log_frequency); // log data every X second/s
}
And that's really it!
Note that we can then decide how many samples we want to collect in time by putting a delay(X_milliseconds) in our loop function (in my example, I set the logger to save data on file every 1000 ms).
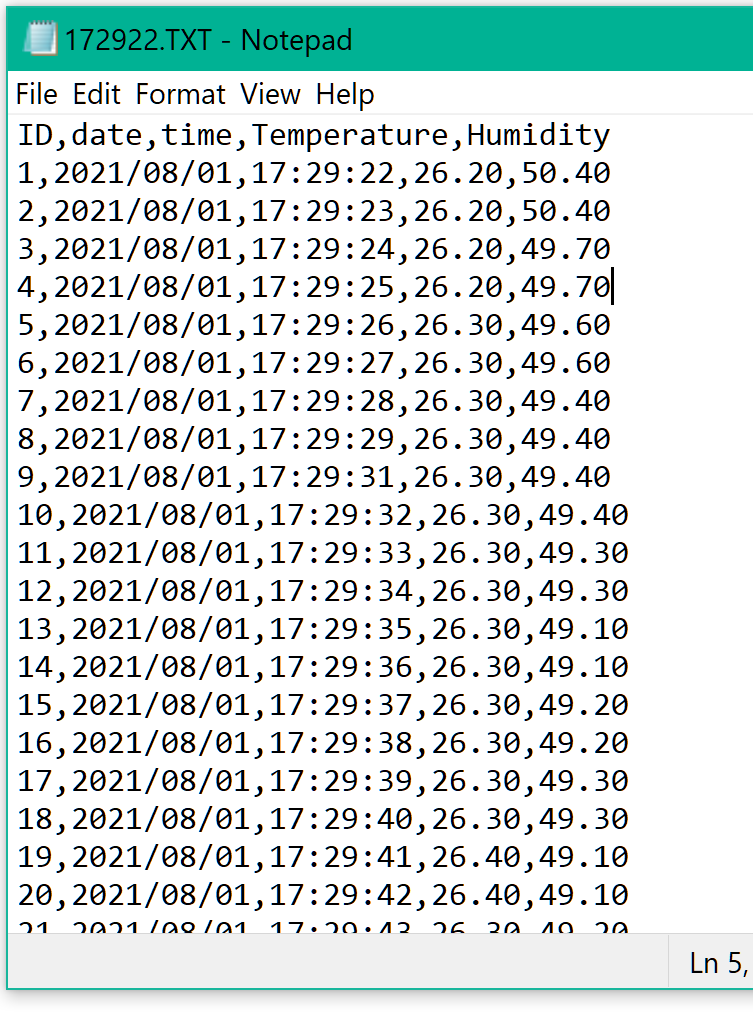
This is how our log file will look like
Comments